Wednesday, October 5, 2011
I'm a sucker for a ruffle!!!
And a ruffle pillow??? Count me in! GroopDeals has the sweetest pillows up today, and you can even enter to win a pair! Go check it out!!
Monday, September 19, 2011
Meet Tilly!
As Rachelle was celebrating the first birthday of the precious Sophia, our home at the opposite end of the West Coast was welcoming a new member to our family... meet Tilly!

She is 3 weeks old today and she came home with us last week. She is a mini Vietnamese Pot Bellied Pig. About 2 pounds, 5"tall and 7" long and quite possibly the cutest critter on the planet! The last week have been full of bottle feeding and potty training her, so I have had no time to be on my computer. But life is settling down now and we have a rhythm going so I'M BACK!!!!

**I think she has my eyes... what do you think?!**
Crafty Kids: Apple Edition
Fall is my favorite season of the year. I love the crispness in the air, crunchy leaves underfoot, hot coffee, cozy sweaters... and apples! There are so many things that you can do with apples {besides eat them of course}. I scoured the web and found some of my favorite kids crafts that are inspired by the almighty apple!


Apple365 shows off some adorable apple stamps.. such a cute idea!
Family Fun took the same apple stamp and put it onto a cute tote

Craftberry Bush used the apple stamp to make a darling wreath
Kindergarten Hoppenings has tons of apple book, poems, printables, and art ideas!

Kiboomu shows you how to make a Johnny Appleseed handprint apple tree
Totally Tot's makes a "a is for apple"

Preschool Daze has some fun apple activities perfect for preschoolers
No Time for Flashcards made a cardboard apple with a fruit loop worm!!!!!
What are your favorite apple activities to do with your kids? I would love to hear em'!
Wednesday, September 14, 2011
Birthday Party: Zebra {with a touch of poodle}
Sophia's party was so much fun and we were so fortunate to be able to celebrate her special day with our amazing family and friends. We are so blessed to have each and everyone of them in our lives. Our daughter does not lack in the love department... she has so many people who love her so much!
 Remember those coffee filter pom-poms? Well they made an appearance at her party in the form or table decorations!

 I took the wire grate off of an old gate that was on our side yard and used it above the outdoor fireplace at my parent's house to hang all of Sophia's weekly pictures (not going to lie... so glad that little project is done and over with).
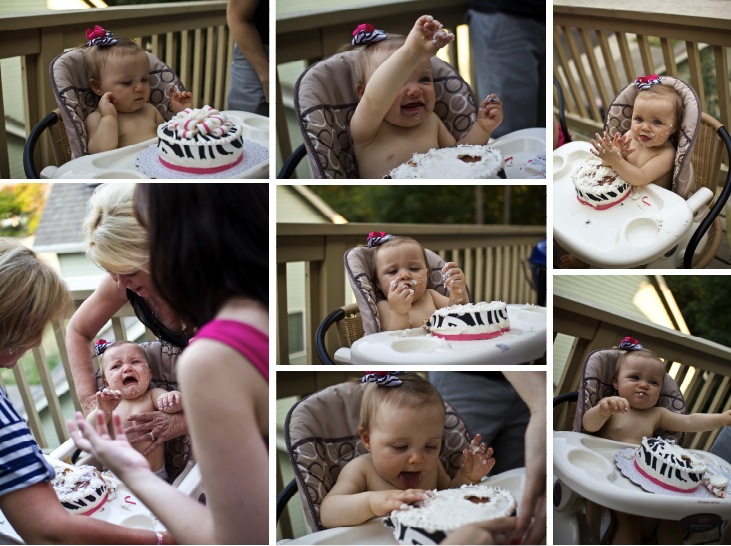
 Less than a week before her party I still had no idea what I was going to do for a smash cake. I wanted something to match her party, but I was not finding anything I liked. So I enlisted the help of my mother-in-law who enjoys cake decorating and she made this for her. Isn't it so cute?!?!
 I did a sweets table outside also. I hung all the ruffled streamers and put up a zebra stripped "sweets" sign. On the sweets table I put out zebra cupcake liners that had ice cream scooped inside, chocolate dipped pretzel rods, as well as some cupcakes in {baby food} jars. Next to this table I had a decorating station where people could pop the lid off of their cupcake and decorate them with frosting and sprinkles!

 I created lots of printables that matched her theme. I created cards for the food tables, stickers that I used on the cupcake jars, and note cards that said remember when for our guests to write their favorite Sophia memory. Of course there was also LOTS of pictures all over the place of her first year.
 We decided to wait to let her have any cake till her party. So her little mouth had never tasted the goodness that is frosting! It was so fun to watch her reaction and to see her dig in for the first time. As you can see by the bottom picture on the left she was not too happy when cake time was over!
 Lastly, her birthday outfit is the one thing that I did not create myself (well, and the smash cake). I actually got the entire outfit custom made (the tu-tu, embroidered onesie and bows) on etsy from a shop called tutu2cute. She did an amazing job, got it to me quickly and customized perfectly everything I asked for.


I threw around the idea of putting her canvas on the front door, but decided instead to use it to decorate the gift table. I used a easel to stand it up and tossed a few pom-pom balls around it for good measure.


Monday, September 12, 2011
Letting the dust settle...
This weekend was a whirlwind of birthday mayhem... and I am still recovering... let me catch my breath!
I have so many cute details that I can't wait to share with you, but I haven't even looked through the pictures of the party yet (and as those who know me personally can attest that is CRAZY because I am almost as obsessed with looking at pictures of the party as I am with throwing the party). I will be back on Wednesday to share lots of the crafty birthday details with you all (side note: the cupcakes in a jar turned out A-MA-ZING!)
So, be sure to check back on Wednesday to see how we celebrated our little peanut's first year!
Pssstttt... check out the video the hubs put together that we showed at her party on Saturday (I totally had to avert my attention to something else when we showed this to keep myself from folding up in the fetal position and full on doing the ugly cry)
Friday, September 9, 2011
A year ago...
A year ago today... I was scared... anxious... excited...

Today, those emotions about wrap up what I am still feeling.
I am scared that I will let these little moments that I have with my daughter pass, because she will never be this age again.

I am anxious that I won't do the right thing, say the right thing, raise her the right way.
I am excited to see who she grows into, what she does next.


One year ago today, I was praying that everything would turn out alright. That she would be healthy, happy, full of life and that I would have the strength to make it through the day. And today my prayer is still the same!
Most days I fill with snuggles and love, playdates and crafting.... but today I will just focus on the snuggles and love part, because she deserves it! Today is her day! Today we celebrate her! Happy 1st Birthday Soph! I love you...
Wednesday, September 7, 2011
Crafting with the Stars
Have you heard of it? If not you need to check it out!
Rachelle entered her Fireplace Makeover in hopes to be part of this seasons "crafting with the stars"
Head on over and check out some of the other amazing entries. Click on our fireplace makeover while you are there (#98). Rumor has it the more that it is clicked on the better chance you have in getting noticed by the judges.
how I saved my marriage {diy tiered tray}
 I have a horrible habit of leaving all my makeup out on the bathroom counter... it drives my husband CRAZY! I don't know why it is so hard for me to simply put it back in the drawer when I am done, but it is. I have even tried getting some cute drawer organizers thinking that would motivate me, but not so much! It is a strange phenomenon that I don't really understand because I am straight up giddy about organization in every other room in our house, but I just can't get it together in the master bathroom.
So to keep my husband from full on killing me I came up with a plan, and it required some diy goodness! I made a tiered tray {bowl on top/plate on bottom} that now lives on our bathroom counter that my makeup goes in. It is a win/win for us because it gives the illusion of picked up {which makes my husband happy} while not having to actually put anything away {which makes me happy... man how lazy do I sound?}.
~ bowl {I used an old plastic picnic bowl}
~ plate {I used a plastic picnic plate}
~ salt shaker {I used the kind that had a screw on lid, so I screwed that off before I started}
~ E6000
~ gloss spray paint
What I did:
{one} clean your bowl, plate and shaker well before starting
{two} lightly coat the top and bottom of your salt shaker with the E6000 and stick the bottom to the center of your plate and the top to the center {bottom} of your bowl

{four} paint your tray the desired color and let dry {make sure to do thin even coats... you do not want your paint to run}

Once it was completely dry I added it to the corner of my counter. I also took two glass votives {one small and one medium} and used the epoxy to hold them together as well. Once dry I filled the large votive with some dry split peas and used it to hold my makeup brushes and tweezers.
Tuesday, September 6, 2011
Melty bead fun with the kids!

I was supposed to post last Tuesday. I had a fabulous project all started that I planned on sharing with you guys. It's easy, it's cute, it's FREE! Well, that project came to a screeching halt when the kids found a giant bucket of Melty Beads that my son's teacher gave me at the end of last school year.
 |
| Baby #2 {aka Chelsey made these for my hubby} |
 | ||||||||||
| We added magnetic strips to the back and viola! magnets for his desk at work! |
Monday, September 5, 2011
{ruffled} streamers
 We are in full on birthday mode in our house this week. My baby girl turns one on Friday and her party is on Saturday. One thing is for sure, when you have a mom who loves to get a little crafty, a birthday can not pass without some serious homemade decorations going on. I already showed you the pom-pom puffs and the zebra platters that I made {by the way, I took your suggestions and will be adding a little monogram to them this week}, but I wanted to give you one other sneak peak into her party.


Wednesday, August 31, 2011
Organization Week : Craft supplies
I am one of the lucky ladies out there that happens to have a craft room! It doubles as a guest room/our son's room when he is home every other weekend. But for the most part, that room is MINE! I love it in that room. All of my fantastic crafting items are in there. My beloved glue gun is in there *sigh*. My husband's grandmother gave me a fantastic wall unit that covers the better half of one wall and is perfect for storing all of the crap precious items that I have amassed collected over the years. This is how I keep the chaos low and my wall unit looking tidy until the day that the doors get installed {hint hint, husband o' mine}.

Fabulous, right?! And this is just one hunk of that room! It is Heaven you guys, I will do a whole post about it when I get it just how I am wanting it :) Pretty much everything is grouped in like items.


Beads and jewelry making things are in plastic cases and color coordinated and put into photo boxes. I have tons of jars that hold my fabulous button collection, some chipboard odds and ends, safety pins etc. This is my favorite shelf...
 Baskets hold little wooden things that will go into my fairy garden and another holds magnetic stuff. My goal today is to get tags on all of the baskets so it is easier to see where things are at a glance.

Last but not least are the cigar boxes. They are the perfect size for holding markers, jewelry making tools, cards etc. These too will be labeled by the end of the day. I saw a fabulous idea a year or so ago on a blog using little pulls so they are easier to pull out of a stack. I need to hunt for that article... how do you store your crafting supplies?

Fabulous, right?! And this is just one hunk of that room! It is Heaven you guys, I will do a whole post about it when I get it just how I am wanting it :) Pretty much everything is grouped in like items.


Beads and jewelry making things are in plastic cases and color coordinated and put into photo boxes. I have tons of jars that hold my fabulous button collection, some chipboard odds and ends, safety pins etc. This is my favorite shelf...


Last but not least are the cigar boxes. They are the perfect size for holding markers, jewelry making tools, cards etc. These too will be labeled by the end of the day. I saw a fabulous idea a year or so ago on a blog using little pulls so they are easier to pull out of a stack. I need to hunt for that article... how do you store your crafting supplies?
Monday, August 29, 2011
Organization Week: Hair Accessories
I am a big fan of baby bows... I mean a B.I.G fan! I don't even think that Sophia was a few hours old when I slapped her first bow in her hair. I always had this fear that people would think she was a boy {which still happens even with a big ol' bow in hair... go figure}. I just think bows are so pretty and cute and well, I just love them. The only problem with bows is they are so easy to misplace. I learned pretty early on that if I was going to support my bow buying/making habit, I needed to figure out a way that I could organize them easily and for cheap {I mean, I had to do it for cheap so I could buy more bows}.
I made two different places to organize hair bows in my daughters room. The first place was to organize her clips, and the second place was to organize her headbands. This is nothing ground braking, people! I used many tried and true methods but with my own spin on it.
Hair Bow Holder:
{items needed}:
~ old canvas {even a piece of sturdy cardboard/old frame/piece of wood would work}
~ material
~ ribbon
~ staple gun

I usually have way more bows up than this, but this picture was taken on a "bad" organizing week. Do as I say, not as I do people!
{what I did}:
The process is so easy that I don't think it even warrants a step-by-step explanation. All I did was take an old canvas {side story behind the canvas: I decided to make some beautiful art work for my hubs office... well lets just say two hours later all I had to show for it was a canvas that looked like... ummm something brown and nasty was smeared all over it. Not my most shining artistic moment}.

I took some leftover fabric from her crib bedding that my mom helped me make and pulled it taught and straight and stapled it to the back using a staple gun. Then I added coordinating ribbon by stapling it down the canvas vertically. Lastly, I added a piece of ribbon to the top and hung it up next to her changing table.
Headband Organizer:
{items needed}:
~ Round vase {about the same size round as an oatmeal container}--- I got mine at the dollar store awhile back
~ NOTHING ELSE!

{what I did}:
I took headbands and put them around a vase. That's it! I threw around the idea of making a headband holder out of an old oatmeal container, but that would have required some decorating of said oatmeal container and I did not have anything on hand that matched her room.
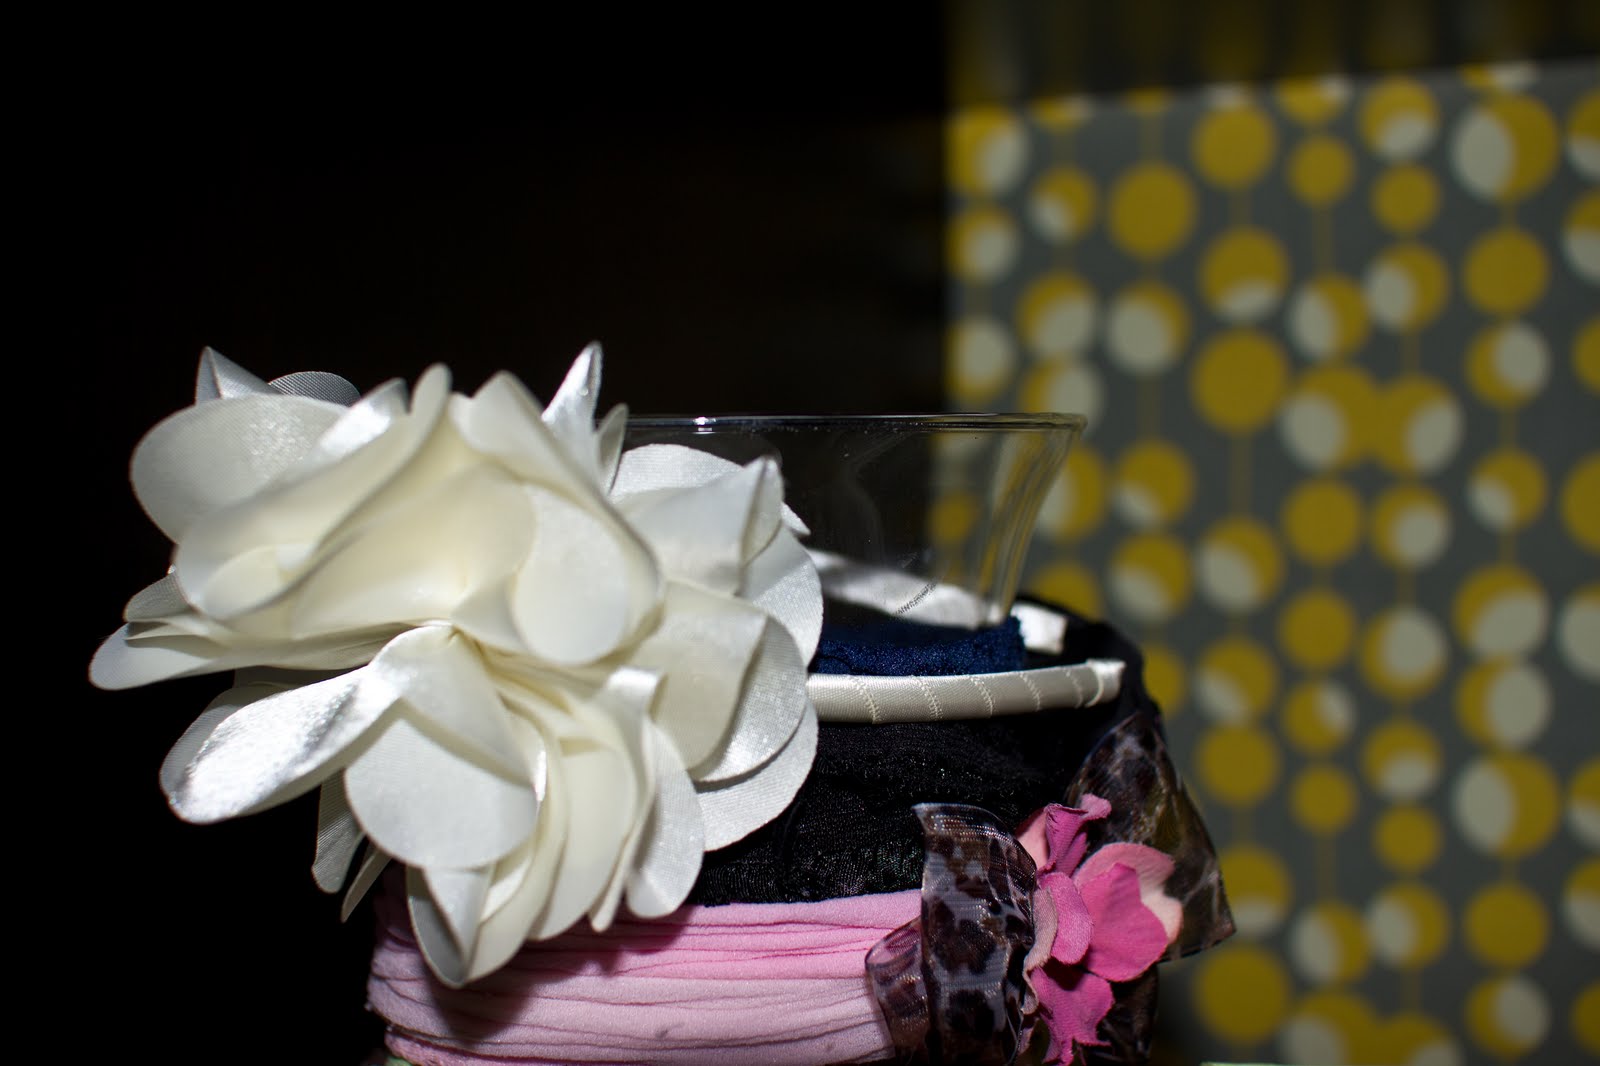
And guess what? Once I added all of her head bands you wouldn't have even been able to see the decorating anyway. So I say the glass vase solution was a win!
So there you have it! That is how I keep my love for baby hair accessories under wrap. Simple, easy, and organized!
Friday, August 26, 2011
coffee filter pom-poms {three ways}
Some business first: Starting in September, Hey sis will have a themed week, the first week of every month. Is there a certain area of crafting that you would like us to feature {i.e. parties, holidays, gift giving, etc}? Let us know!
Our first themed week will be next week {August 29th- September 2nd} and it is all about organization. If you have a great organizing tip you would like to share with our readers {or something that you need help with}, send us an email at heysisblog@gmail.com and let us know!
Alright, enough business... on with the good stuff!
I was recently given a huge container full of coffee filters. They have been sitting in my office, staring at me, taunting me. I knew that there was something cute I could do with them, but I had no idea what.

Pom-pom #1: Classic Look
Items Needed:
~ Coffee Filters
~ Hot Glue Gun
~ Piece of Trash {wadded up in a ball and wrap in tape}
~ Wooden Dowel {optional}

{two} Place a dab of hot glue on the end of the coffee filter and push onto your ball o' trash.

{three} Continue adding coffee filters till you get the desired fullness you want.
Helpful Hint: Start covering the ball all over very loosely. Then fill in the bald spots. This will make your pom-pom look more even in the end.
{four} When you have the desired fullness, use a pair of good scissors to sheer away any bumps you don't like.

Items Needed:
~ Coffee Filters
~ Hot Glue Gun

{two} Fold the coffee filters in half a few times till you end up with a triangle.

{three} Cut the ends off in a triangle .
{four} Continue to do this step to four different stacks of filters. With each stack of filters cut a little smaller than the last.


{six} Continue to do this with each size. Hot glueing all the coffee filters together.

{seven} Flip stack over.


Items Needed:
~ Same as Pom-pom #1
{one} Start by cutting your coffee filters the same way as pom-pom #2, but keep all your coffee filters the same size {instead of all different sizes}
{two} Hot glue your coffee filters to your ball o' trash the same way as you did with pom-pom #1.

The beauty of this pom-pom is you don't have to worry about trimming it in the end because it is supposed to be different levels!
I linked up to the following:
Blue Cricket Design


Go and check out other amazing projects to get even more inspired...
Subscribe to:
Posts (Atom)