Page Links

Showing posts with label decorations budget. Show all posts

Monday, September 5, 2011

{ruffled} streamers

We are in full on birthday mode in our house this week. My baby girl turns one on Friday and her party is on Saturday. One thing is for sure, when you have a mom who loves to get a little crafty, a birthday can not pass without some serious homemade decorations going on. I already showed you the pom-pom puffs and  the zebra platters that I made {by the way, I took your suggestions and will be adding a little monogram to them this week}, but I wanted to give you one other sneak peak into her party. 


A few weeks ago, I was at the dollar tree and I picked up a couple packages of streamers {black, white & hot pink}. I knew I would fancy em' up a bit before the party but was not really sure what I was going to do. So I went online and did a little browsing and found this tutorial and I was in heaven! If you have not checked out some of Dana's amazing creations over at Made get on over there and check it out... you will not be disappointed! 
I am not even going to leave you with a tutorial of how I did my streamers, because I seriously followed her directions exactly and it worked perfectly! I will just leave you with some pictures {because what's a post without pictures?}
What I love most about this project is you do not have to be an expert sewer.... I mean really, you don't even have to be able to sew a straight line. My lines on my streamers are not super straight, but I like it that way, it helps them curl a little more when hung, and gives it even more texture!

Monday, August 29, 2011

Organization Week: Hair Accessories


I am a big fan of baby bows... I mean a B.I.G fan! I don't even think that Sophia was a few hours old when I slapped her first bow in her hair. I always had this fear that people would think she was a boy {which still happens even with a big ol' bow in hair... go figure}. I just think bows are so pretty and cute and well, I just love them. The only problem with bows is they are so easy to misplace. I learned pretty early on that if I was going to support my bow buying/making habit, I needed to figure out a way that I could organize them easily and for cheap {I mean, I had to do it for cheap so I could buy more bows}. 

I made two different places to organize hair bows in my daughters room. The first place was to organize her clips, and the second place was to organize her headbands. This is nothing ground braking, people! I used many tried and true methods but with my own spin on it.

Hair Bow Holder:
{items needed}:
~ old canvas {even a piece of sturdy cardboard/old frame/piece of wood would work}
~ material 
~ ribbon
~ staple gun
I usually have way more bows up than this, but this picture was taken on a "bad" organizing week. Do as I say, not as I do people!

{what I did}:
The process is so easy that I don't think it even warrants a step-by-step explanation. All I did was take an old canvas {side story behind the canvas: I decided to make some beautiful art work for my hubs office... well lets just say two hours later all I had to show for it was a canvas that looked like... ummm something brown and nasty was smeared all over it. Not my most shining artistic moment}.
I took some leftover fabric from her crib bedding that my mom helped me make and pulled it taught and straight and stapled it to the back using a staple gun. Then I added coordinating ribbon by stapling it down the canvas vertically. Lastly, I added a piece of ribbon to the top and hung it up next to her changing table. 

Headband Organizer:
{items needed}:
~ Round vase {about the same size round as an oatmeal container}--- I got mine at the dollar store awhile back
~ NOTHING ELSE!
{what I did}:
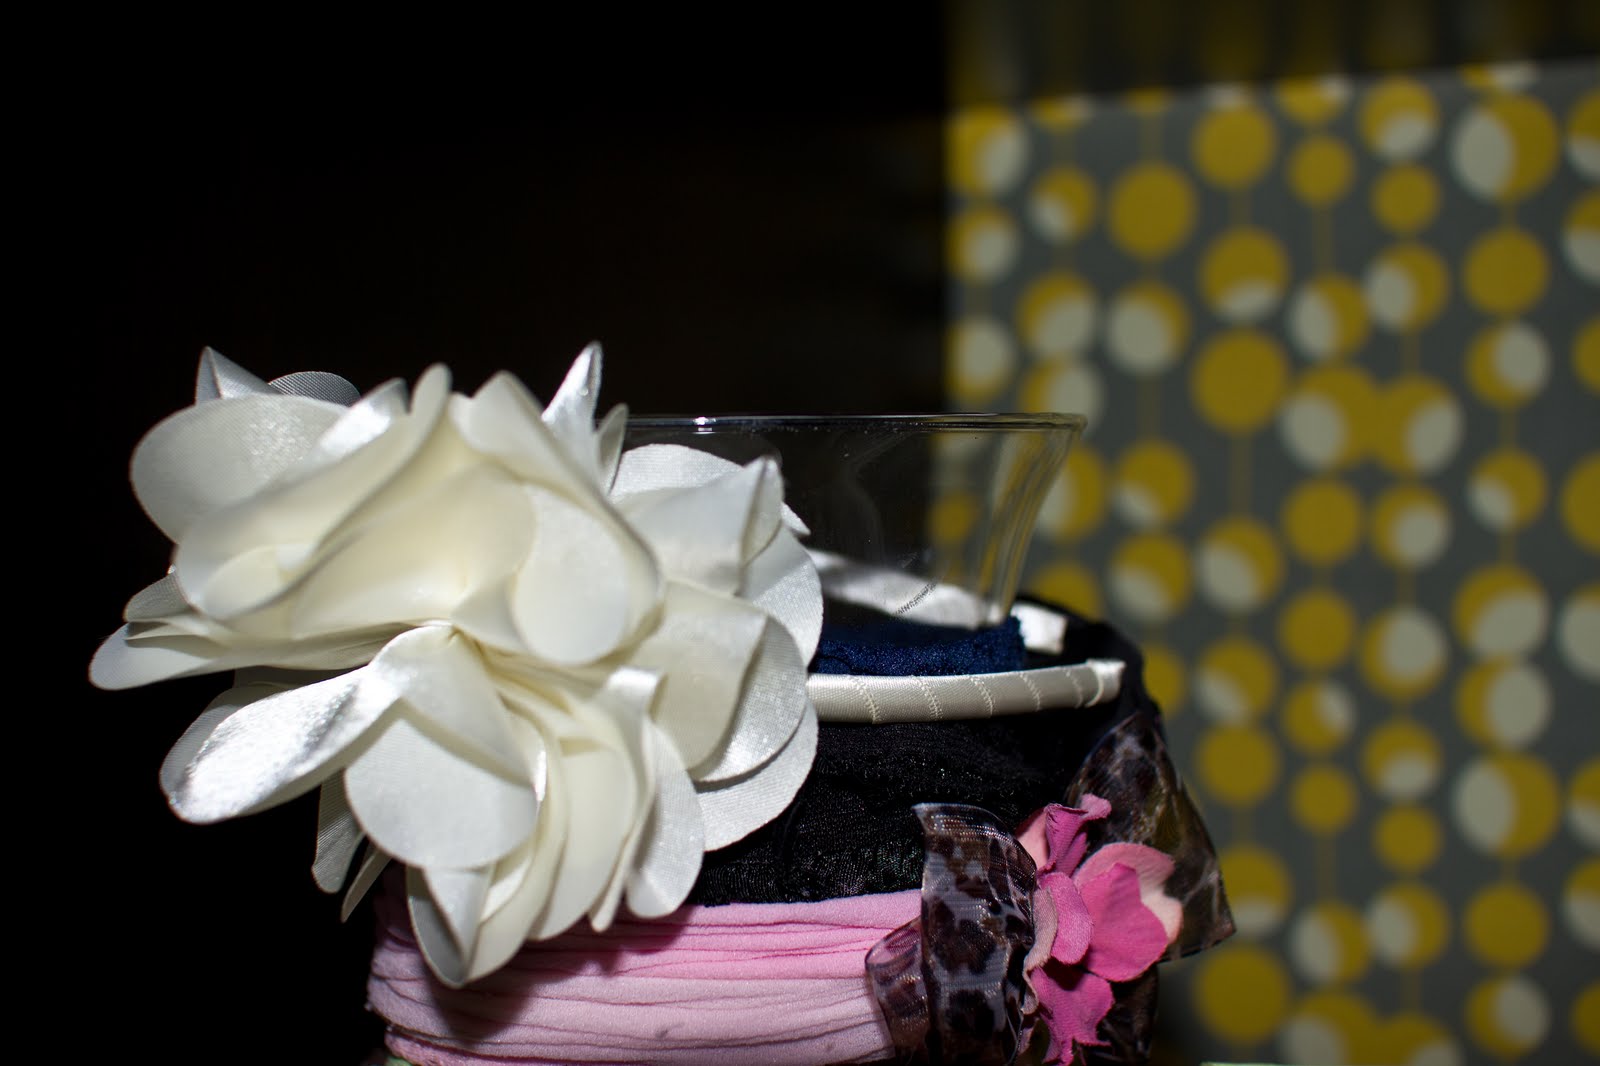
I took headbands and put them around a vase. That's it! I threw around the idea of making a headband holder out of an old oatmeal container, but that would have required some decorating of said oatmeal container and I did not have anything on hand that matched her room. 
And guess what? Once I added all of her head bands you wouldn't have even been able to see the decorating anyway. So I say the glass vase solution was a win!

So there you have it! That is how I keep my love for baby hair accessories under wrap. Simple, easy, and organized!

Friday, August 26, 2011

coffee filter pom-poms {three ways}


Some business first: Starting in September, Hey sis will have a themed week, the first week of every month. Is there a certain area of crafting that you would like us to feature {i.e. parties, holidays, gift giving, etc}? Let us know!
Our first themed week will be next week {August 29th- September 2nd} and it is all about organization. If you have a great organizing tip you would like to share with our readers {or something that you need help with}, send us an email at heysisblog@gmail.com and let us know!

Alright, enough business... on with the good stuff!


I was recently given a huge container full of coffee filters. They have been sitting in my office, staring at me, taunting me. I knew that there was something cute I could do with them, but I had no idea what.

I finally made a decision to use them to make some pom-pom puffs. I totally winged it {isn't that what I always do} and I came up with three different ways that turned out so cute {and if I am being honest, I came up with a few others that were hideous}. The beauty of this project is that it was 100% FREE!


Pom-pom #1: Classic Look
Items Needed:
~ Coffee Filters
~ Hot Glue Gun
~ Piece of Trash {wadded up in a ball and wrap in tape}
~ Wooden Dowel {optional}


{one} Put your finger or the wooden dowel in the middle of the coffee filter and wrap it.
{two} Place a dab of hot glue on the end of the coffee filter and push onto your ball o' trash.

{three} Continue adding coffee filters till you get the desired fullness you want.
Helpful Hint: Start covering the ball all over very loosely. Then fill in the bald spots. This will make your pom-pom look more even in the end.
{four} When you have the desired fullness, use a pair of good scissors to sheer away any bumps you don't like.
Pom-pom #2: Water Lily Look
Items Needed:
~ Coffee Filters
~ Hot Glue Gun
{one} Grab 3 or 4 coffee filters and place on top of each others. 
{two} Fold the coffee filters in half a few times till you end up with a triangle.


{three} Cut the ends off in a triangle . 
{four} Continue to do this step to four different stacks of filters. With each stack of filters cut a little smaller than the last. 
{five} Start with the largest coffee filters, and hot glue a small dab in the middle and stack one on top of the other. When stacking place them on top of each other so that they are not all exactly turned the same way. 
{six} Continue to do this with each size. Hot glueing all the coffee filters together. 

{seven} Flip stack over.
{eight} Begin scrunching in each layer once at a time, till you end up with something that looks like a water lilly. 
Pom-pom #3: Classic with a twist. 
Items Needed:
~ Same as Pom-pom #1


{one} Start by cutting your coffee filters the same way as pom-pom #2, but keep all your coffee filters the same size {instead of all different sizes}
{two} Hot glue your coffee filters to your ball o' trash the same way as you did with pom-pom #1. 


The beauty of this pom-pom is you don't have to worry about trimming it in the end because it is supposed to be different levels!


I linked up to the following:
Blue Cricket Design 
The Shabby Nest    
Go and check out other amazing projects to get even more inspired...

Thursday, August 25, 2011

When life gives you lemons...


Throw them in a white bowl and make your kitchen look cute!


Throw a few slices down the garbage disposal, clean a stain off the counter, rub a slice on your fingernails to get the yellowy stain that red polish leaves behind ...


and don't forget to slice a few up to have ready for guests to share a yummy glass of icy cold water or iced tea with you on a warm summer afternoon! :)

Friday, August 19, 2011

zebra tray {diy style}

My daughter is turning one in about 3 weeks, and I have been trying to do a little here and there to keep myself for feeling overwhelmed right before the party. I knew a few months back that I wanted to use zebra print and hot pink in her party {with a little flair of poodle... I know that sounds strange but I promise it will be so cute... just you wait}. 


I started searching a few weeks back for some cute zebra print serving trays. Here are a few that I found that I loved...
"More than Paper" Zebra Tray- $40

M & N's Custom Monogrammed Gifts- $42

Haiti Gallery Art & Home Decor- $24.95
Any of these trays would have been a perfect fit for the party, the only problem was the price. I am working with a pretty tight budget for this party, and I could in no way justify spending that much on something that was going to be used for one party {I am sure I would reuse it for other special occasions, but not that often}. 


So, I decided to create my own zebra tray{s} and they turned out perfect for what I needed. It took me about 30 minutes to make both trays and it required no glueing, no sewing, and no clean-up! 


{what you need}:
~cookie tray {I picked up 2 at the dollar store}- $2
~ zebra print duct tape {I got mine at Michaels with a 40% off coupon}- $2.99
GRAND TOTAL {for both trays}- $4.99


Disclaimer: I did not take pictures of the process... in fact the tray in the above picture is one of my old cookie trays, hence the reason it looks a bit *ahem* loved. I will try to explain the process the best that I can.


{here's what I did}:
{one} cut 4 small strips of duct tape and attach them to your four corners {this is important because it creates a buffer, in case all your corners don't line up perfectly}
{two} cut and stick long strips down on the top of your tray, going slightly up on the walls of your tray. 
{three} cut strips of duct tape the length {plus a little wiggle room} of the four sides of you tray. 
{four} doing one side at a time cover the four walls of your tray, lining up the edge of your duct tape to the place were the flat part of your tray and the wall match up and then working up and around the back edge. 
{five} continue with all four walls and you are done!


{what I LOVE about this tray}:
~ It wipes down easily without worrying that you are going to ruin it.
~ When you get bored of the zebra print you can remove all the duct tape and make a different try to match your next party {or better yet just cover over the duct tape}
~ It was EASY!
~ It didn't cost an arm and a leg {I think that may be my favorite part}


I am still throwing around the idea of adding a little monogram to it but I am not sure yet. The tray will be used for food, so the monogram will most likely end up covered up... Hmmmm.... What do you all think? Should I add the monogram or leave it as is?

Friday, July 22, 2011

Brought to you by the letter "P"

I actually made this monogram wreath awhile back and am thinking of changing it. However, before I did I thought I would walk you all through a quick step-by-step of how I did it. The beauty of this wreath is it was easy and cheap so I don't feel bad changing it up all the time, because it was not like I spent a fortune. And also I don't have room for tons of different wreaths {maybe someday I will}, so having this cute "P" that I can change the look of whenever is a win-win for me!


I bought this letter P over a year ago at Jo-Ann's. It was 50% off because it was a little scratched up but that did not matter to me because I knew I was going to cover it anyway. I paid less than $5 for it {not sure exactly how much, but I remember it was a good deal}. The letter is one of the paper mache letters, not the wood kind, which I like better because they tend to have crisper lines and be a bit more simple in shape {which I like... but it's a preference people}.


I had originally bought it to use during Christmas. I wrapped it tightly in green garland and added some iridescent orange and pearl berries to hang in my living room. It served me well for two Christmas' but then I got bored of it {as I do with most things in my house}. So in February of this year I revived it into something spring-y! 


Here is what I did:
If you are a librarian please avert your eyes for a moment... 
1. Found an old book lying around the house and I ripped {gasp} out a bunch of pages. 
2. I used my handy dandy paper cutter and cut strips of paper. 
3. Then I had to make the decision of how I wanted the paper to look. I tossed around two ideas: I could either just to throw the paper strips in all different directions for a more "rustic, wind blown look", or have all the strips going in the same direction for a more uniform look. I choose to go with the second idea because the thought of the words being chaotic quite frankly stressed me out. 
4. I mixed up some poor mans mod podge (Elmer's glue diluted with a bit of warm water), and started sticking my strips of paper on. 
5. Once I had the letter completely covered I went around the edge with more strips to make it look a bit more finished and then gave the whole things a quick once over with more of my glue mixture to really seal it up. 
6. Next I made my birds simply by cutting out a simple bird shape and two simple wing shapes from leftover book pages and some craft paper I had on hand. I glued a wing to each side of the bird and added a rhinestone eye for a little bling!
7. I made the flower by cutting out three different petal shapes (large, medium, and small). Once they were cut out I just started glueing them on top of each other in a circle, till I got the desired fullness. Then I took a wooden skewer and wrapped the ends of the petals around it, to give the petals a little curl on the ends. Lastly I added a bunch of sparkly beads to the center of the flower by using the very precise glue and dump method! {I did not use this exact tutorial but it was similar to this... I obviously tweaked mine quite a bit but this is a good place to get a visual of what I am talking about}
8. Lastly I played around with where I wanted my birds and flowers. Once I liked were I had them I hot glued them in place. 


Happy Wreathing!


Tuesday, July 19, 2011

Got cassette tapes?!

Okay kids... know that stash of cassette tapes that you have on the top shelf of your closet? Well go grab them! All this project requires is 10 cassette tapes (my friend gave me hers, but I have seen them at the thrift stores for $0.25!), glue (hot glue or E6000, hot glue is quicker, E6000 is stronger) and a small bit of craft foam-if desired.


I made two of these a few years back. One for little pads of paper and one for pens. I found that pens tended to get stuck in the little holes on the tapes, so I glued a bit of craft foam in there.


You get the idea of how they are glued together from this pic. I glued the sides together first then stuck the bottom on.


And here they are where they live on our little desk. Helps keep things nice and tidy and is fun and a little retro :) there you have it... a super fast project for ya! Enjoy!!

ps... sorry about the poor picture quality... these are from my little point and shoot :)

Monday, July 18, 2011

Baby Shower- Owls & Pinwheels Decorations

So I am back to talk about the Owl & Pinwheel shower decorations. Everything that we made was super easy but some were a little more time consuming then I had anticipated. However it was all TOTALLY worth it in the end! I am about to spew a lot at you so go and grab a cup of coffee and get cozy… it’s ok I’ll wait…
////////////////////////////////////////////////////////////////////////////////////////
OK, are you ready? Let’s get started!

Pinwheels:
To make our pinwheels I used this tutorial but modified. I did not really care if the pinwheels spun around or not. So I just did the first part of the tutorial without adding the pin to make it spin. 

Here are a few things that I learned in this process that I wish I knew BEFORE I started making the pinwheels:

{one} Thicker is NOT better- When I bought the paper for the party I got really nice and thick cardstock, however when making pinwheels you want a lighter weight cardstock. The paper we used for the pinwheels was so thick I wanted to scream (ok… lets be honest I may have actually screamed a few times). Since the cardstock was so thick I had to use more hot glue then I would have liked, fortunately I had a bunch of super cute beads that I could put in the middle to hide this little problem.
{two} Hot Glue is…. HOT- Ok, so I realize that this is a “no duh” statement but when hot gluing a precise (read: small) area it is best to have a little dowel to hold the paper down as opposed to your finger. Pretty sure I completely burned my fingerprints straight off before I finally wised up and started using a dowel. Hey I never claimed to be smart, just crafty!

Canvas:
I have been seeing the idea of using a canvas as a guest book for a wedding floating around the internet for awhile now and I have just been itching to throw some sort of party that would warrant me doing one. Once the theme was set for the shower I knew that this was something that I had to do for the party! Making the canvas was super easy!

{one} I started by drawing a picture of a tree on a piece of paper, cutting it out and stenciling it on the canvas (I am sure I could have just drawn the tree directly on the canvas but I was not sure how well the pencil would erase from the canvas if I made a mistake and I am not that confident in my drawing ability)
{two} Paint the tree in desired color (I found it best to paint the outline first with a thin brush and then go back and fill in)
{three} Let dry!
{four} I had some of the material that Everett’s nursery is being done in so I got out my super sharp sewing scissors and very carefully cut out three little owls from the material. (I also tossed around the idea of making a simple owl out of paper and sticking it on, but I loved the fact that when the canvas was done it would exactly match his room)
{five} To adhere the owls I used some liquid fabric starch and water. I decided to do this versus mod podge for a few reasons: (1)If I did not like were the owl was placed I could simply peel it off wipe down the canvas and stick him on somewhere else. (2) If Patti decided that she did not want to hang it in his room but somewhere else, she could peel the owls off and add something else (or leave it plain) and no one would know!
{six} Lastly I used a fine tip permanent pen to write Everett’s name on the canvas, and viola!

I thought that this project was going to be the most difficult to pull off and it was the easiest and took hardly any time at all!

Bunting
I got the inspiration for the paper bag bunting from here
I did mine a bit different then the tutorial said. For one, I did not use material but paper that matched the pinwheels. I also did not cut any of the bag off. I used the extra amount of paper on the bag to fold over and sew across of to create a loop for the yarn to go through. I also kept mine a bit simpler than the tutorial is for. I knew Patti would end up using it in Everett’s nursery and I wanted to keep it sweet and simple so it would easily be incorporated into his room.
Also, sadly I do not have a silhoutte, so I printed out the letters I needed off my computer and had a friend (thanks Vanessa) cut the letters out, trace them onto the cardstock and then cut those out. This made a project that should have taken less then an hour take…. Ummmm… well lets just say it was a lot longer than an hour.
After making the bunting with Everett’s name, we also made ones that said food and gifts.


“Love Note” Tree:


I had an idea to keep with the tree theme of the canvas to make a “tree” for people to hang love notes on to Baby Everett. So easy and cute!

Literally all I did was send the hubs out to cut down some branches. Then I threw a bunch of decorative marbles into a big vase, wrapped the vase with the leftover yarn from the bunting and popped the branches into place. 

For the love notes, I took the scraps of cardstock I had left, cut them to 4X2½ inch pieces, and printed out on sticker paper something that said “love note to Everett” with a little owl on the bottom.

When people came to the shower they wrote a note and put it up on the tree with a clothespin.


There were tons of other things that were added to the party for little to no money, but those are the main things. {did I overload you?}

I will be back later this week to give you some free printables I used for the party!